Creating a package is the first step in getting to work with SSIS. There are two ways to create a package:
- By using Import And Export Wizard in SQL Server 2008.
- By creating a package inside an SSIS project in BIDS.
Using Import And Export Wizard in SQL Server 2008
When you create a package with the Import and Export Wizard in SQL Server 2008 you don't have to go through the process of creating a SSIS project. You can use the wizard through SSMS (SQL Server Management Studio).Note:
- To launch SSMS, from the Start menu select --> Microsoft SQL Server 2008 and then --> SQL Server Management Studio.

Import And Export Wizard helps you to either import or export data.
- Importing data lets you bring into a SQL Server table any data from other SQL Server databases, flat files, Microsoft Office Excel spreadsheets, Microsoft Office Access databases, and Oracle databases.
- Exporting data lets you send data from SQL Server tables, views, or custom queries to flat files or database connections.
To start Import And Export Wizard follow these steps:
- Through SSMS, connect to the instance of the SQL Server 2008 Database Engine that contains your source or your destination.
- Open Object Explorer.
- Right-click the database that you want to use as your source or destination.
- Click Tasks. If the database is the source of data that you want to send to a diffrent system, select Export Data. If the database is the destination for files that are outside the system, select Import Data. See Figure below:

The wizard will walk you through several pages of questions. Lets follow the steps for Import Data Task here:
- Choose A Data Source page. Here you specify where your data is coming from, such as SQL Server database, a flat file, Exel file, Microsof Office Access database, Oracle database.

- Choose A Destination page. Here you specify where your data will be sent. The data destination settings will match those of the database you selected prior to starting the Import Data wizard, but you can change those.

- Specify Table Copy Or Query page. Here you can choose to copy one or more tables and views from the source, or you can write your own query (if you selected a relational database source that allows custom queries).
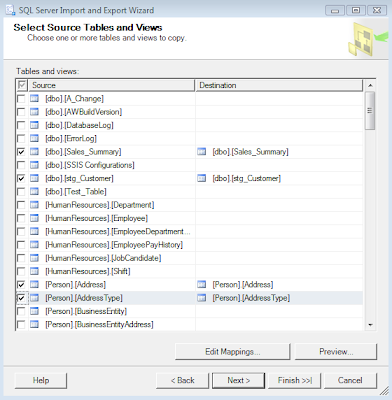
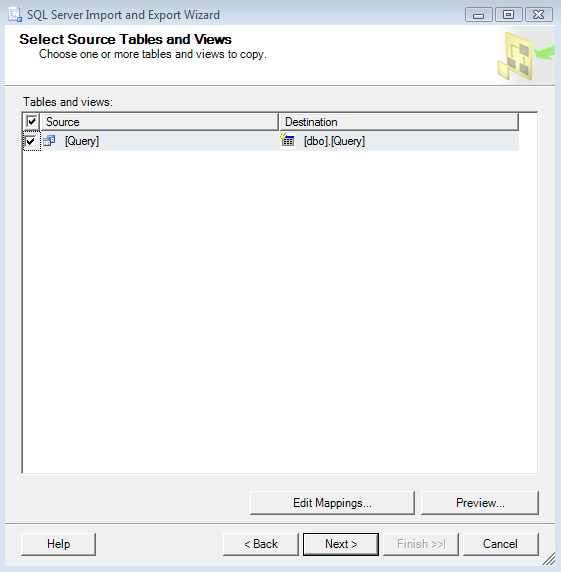
- If you choose Copy data from one or more tables and views, the next page named Select Source Tables And Views will enable you to select from the list of tables and views. You can choose more than one table and/or view.
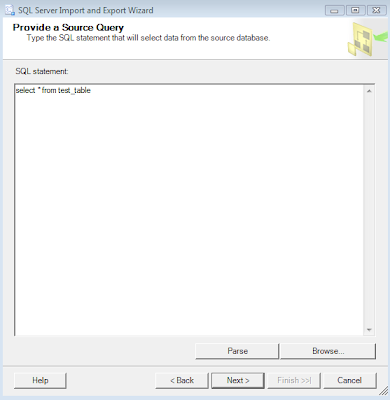
- If you choose to specify a query, an additional page, named Provide a Source Query, enables you to enter the query.In the next page, Select Tables And Views, only your query will be available as a choice. The same thing will be true when your source is a flat file; only the flat file will be available as a choice.
 Also on this page, you can rename the destination table and edit the column mappings by clicking the Edit Mappings button to define column NULL settings, identity insert, and whether the table should be dropped and recreated every time.
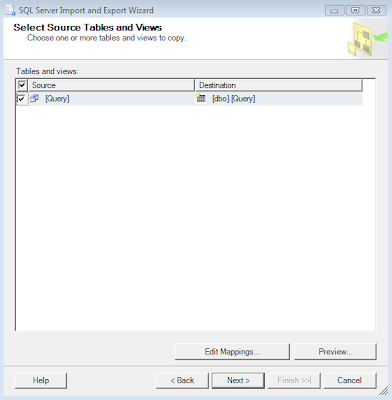
- Save And Run Package page. You can run the package immediately and/or save it for later execution.
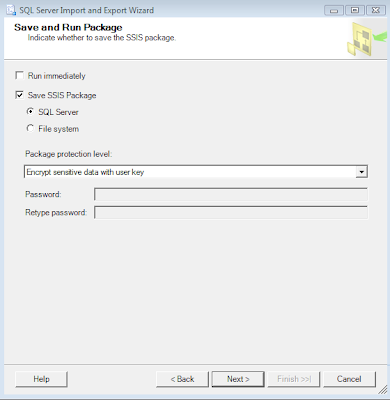


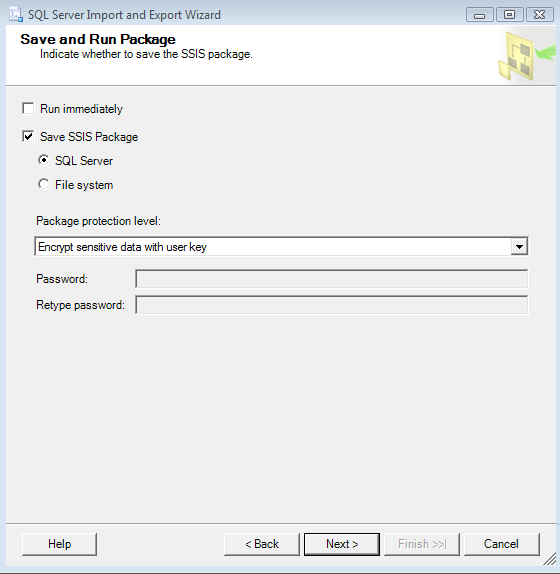
If you save the package, you can later go back and edit it by using SSIS Designer. In other words, you open the package within an Integration Services project in BIDS. You can create the package by using the wizard but you can NOT edit it through the wizard. You can restart the wizard and recreate the whole package from the begining, or you can edit the package in BIDS.
So, in a last note, here are some limitations to be aware of when using the wizard:
- You can specify only one source and one destination in the wizard.
- Advanced workflow precedence is not available through the wizard.
- The wizard does not share data sources with other packages.
So, the wizard allows you to build a simple package that moves data from one source to a destination without any complex transformation in between. If you want to add advanced logic create the package within an Inegration Services project in BIDS.


